Seller’s Net Sheet Advanced Instructions
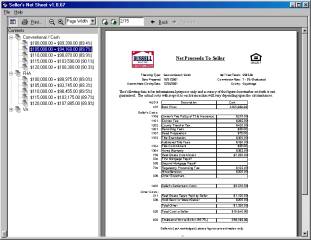 Table of Contents
1. Clicking File, Show Table of Contents will toggle the Table of Contents On and Off.
2.
Clicking the Icon ![]() just to the left of the print button in the quick
view area will also toggle the Table of Contents On and Off.
just to the left of the print button in the quick
view area will also toggle the Table of Contents On and Off.
Note: When multiple Financing Types have been selected, there will be a tree view showing a + sign to the left of the Financing Type. Click the + to expand the tree and – to collapse.
3. Clicking on an individual dollar amount will make that value appear in the quick view window.
4. The values shown are:
Sale Price = Estimated Net (Optional: Estimated Net Percentage)
Show/Hide Data Entry Fields
1. Clicking File, Show Data
Entry Fields will toggle the Data Entry fields On and Off.
2. Clicking the “>” or
“<” button near the bottom left corner of the Net Sheet application will
also toggle the Data Entry fields On and Off.
Zoom Level
1. Use the icons ![]() to change the zoom level. The – magnifying glass will zoom out and the
+ magnifying glass will zoom in. The
default zoom level is Page Width.
to change the zoom level. The – magnifying glass will zoom out and the
+ magnifying glass will zoom in. The
default zoom level is Page Width.
2. Changing the width of the
Table of Contents or hiding/showing the Data Entry fields will change the size
of the text shown in the quick view.
Tip: Don’t worry about the “grainy” look of the Net Sheet
in the quick view window. Printouts
will have much better resolution. For
best viewing, use 1024 X 768 resolution.
Estimated Net Percentage
1. Click File, Show Estimated
Net Percentage to Toggle these values On and Off.
2. The Net Percentage is
calculated as follows: Estimated Net to Seller / Sale Price
3. Net Percentage is shown on
both the Table of Contents and on the Net Sheet itself.
Loading/ Saving Net Sheets
1. Saving Net Sheets
a. Create the Net Sheet using
the Basic Instructions.
b. Click File, Save Net Sheet
As and enter a name for the file. Net
Sheet files use “.nsf” as a file extention.
2. Loading Net Sheets.
a. Click File, Load Net Sheet.
b. Double-clicking a “.nsf”
file from explorer will also load the Net Sheet.
Note: Saved Net Sheets can’t be opened without the Net
Sheet Application (v1.0.67 or newer).
Do not send these files to your customers because they won’t do them any
good.
Exporting Net Sheets
1. Create the Net Sheet using
the Basic Instructions.
2. Click File, Export Net Sheet,
Export to PDF (Adobe Portable Document Format: Requires Adobe Reader to view)
or Export to HTML.
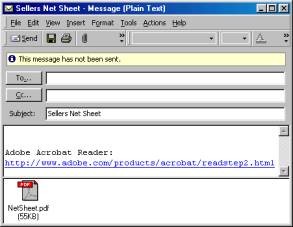
Emailing Net Sheets
1. Create the Net Sheet using
the Basic Instructions.
2. Click File, Send via
Email.
3. In the email window that
appears, select the appropriate recipients and enter a message if
necessary.
Note: The Send via Email function requires that you have
an email client like Outlook, Outlook Express, Eudora or Netscape. Users who use AOL or Hotmail accounts will
not be able to use this feature. Please
use the export functions and attach the exported PDF file to the email.
Note: Net Sheet attachments are in PDF format and include
a link for users without the Adobe Acrobat client to download a copy.